Showing posts with label painting. Show all posts

Wednesday, July 13, 2022

Cold Wax!


Cold Wax is a soft buttery paste that consists of beeswax, solvent, and resin. It is used in painting, specifically oil painting, to help with many techniques. Cold wax can also be used with other mediums beside oil, such as alkyd oil colours, alkyd based painting mediums, and Gamsol. It also mixes well with other mediums such as dry pigment, powdered charcoal, marble dust, chalk pastel, graphite and oils sticks. Cold Wax is not physically cold or requires cold temperatures, the name refers to the fact that it requires no heat.


Cold Wax was created in the 1930’s by Arthur Dove, an American artist. He did so by melting beeswax in turpentine and linseed oil. However it is derived from encaustic painting which has been around since the 4th century B.C, created by the Ancient Greeks. Pausias, a Greek painter of the 4th century B.C is said to have been one of the first recorded artists to use the encaustic painting methods.


Pausias encaustic painting


Cold Wax is very similar to encaustic painting. Encaustic painting is also a wax medium that creates similar effects to that of cold wax. Encaustic painting builds up relief and gives the painting a rich optical effect creating a startlingly life-like illusion. This environmentally safe medium emits no toxic fumes and uses no solvents. The biggest difference between cold wax and encaustic painting is that encaustic painting must have the wax be molten to work with and then reheated once it is applied to the surface. Whereas with cold wax, no heating is required. 


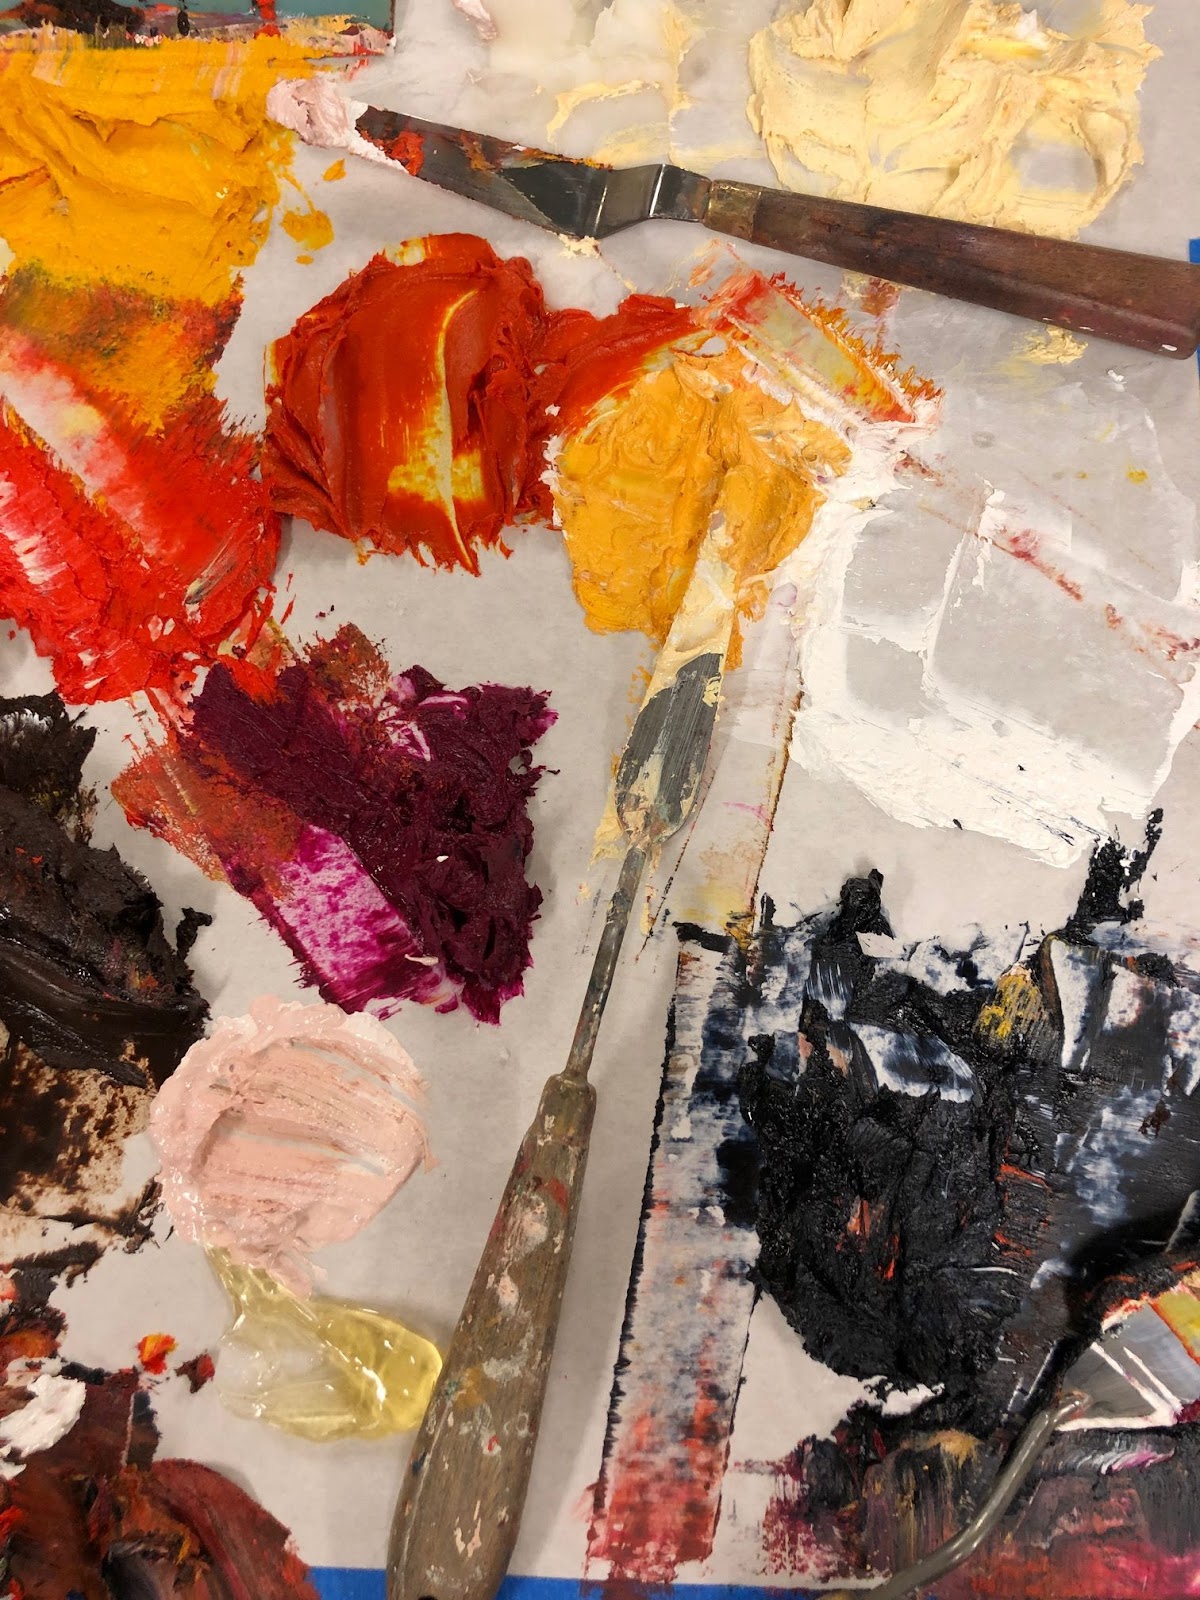
Cold Wax paste has a very easy application process. All you have to do is mix the paste with the oil paint on your mixing palette. When mixing, you will need a ratio of 20% wax to 50% oil paint. The wax and oil paint mixture can be applied with an assortment of materials such as paint brushes, palette knives, colour pushers, squeegee, or rollers. It is best to apply the mixture to rather paper, canvas, or panel as it needs to be applied to an absorbent surface. Once applied, the wax then evaporates and hardens to the density of a beeswax candle. You can also remove cold wax with Gamsol. Cold Wax can also be used as a varnish, and does not just have to be used when mixed with paints. Instead wait for your painting to dry, and then rub a thin coat of the cold wax medium on top. This is a popular desired effect for acrylic paintings. 


Cold Wax can add a number of things to your oil paintings! It helps speed up drying times and it increases the paint's workability. It also adds body, transparency, and depth to your artworks. Cold wax makes the oil colours thicker and dry with a more matte finish. When being used, cold wax and oil paint create a glazing effect with transparent layers being built up.


After using cold wax, it will take about 24 hours to dry to a matte finish. However, if you would prefer a satin sheen finish, use a soft cotton cloth to buff out the cold wax after 4-6 hours. It’s good to note that once the cold wax-oil paint mixture has dried, you can still continue to paint on top of it. Cold Wax paintings are best in cooler temperatures as they do have a melting point of 155 degrees F, therefore be careful where you store it.


Pros

  • Speeds up drying time

    • As quick as within 24 hours!

  • Requires no special ventilation

    • Unlike encaustic painting

  • Makes oil paints thicker and matte

    • Perfect for layering!

  • Adds body, transparency, and depth


Cons

  • Cannot mix with acrylic paint

    • But can be used as a varnish on top of an acrylic painting!

  • Has a melting point of 155 F

    • Needs to be kept in a cooler environment!


Cold Wax is a wonderful medium to test out on your oil paintings! It’s a simple, beginner friendly medium that only requires a small amount to be mixed into your paints. The results create beautiful matte finishes that enhance the body, transparency, and depth of your artworks. The fast drying times the wax creates are a huge bonus to your painting process as well! Using cold wax is definitely a technique to try out on your paintings.


Thursday, May 12, 2022

Brushes


When it comes to brushes, there are many different types, that way you’ll always be able to find at least one to your liking. Each type of brush comes in a different shape and size in order to create a certain texture and thickness. Along with different styles of brushes comes different materials these brushes can be made from. The material a brush is made from can affect the quality of not only the brushes lifespan but the work created with it as well. Lastly, it is very important to understand the proper maintenance of a brush as the better you take care of something, the longer it will last. 

In this article, we will discuss 6 different kinds of brushes and what they are used for.


A Round Brush has all the bristles come to a point. Round Brushes are best used for broad or fine details depending on the size and are overall a staple brush when it comes to painting. 


A Flat Brush has the bristles formed in a flat square shape. This shape creates a perfect sharp edge with the straight tip of the brush. This brush is also useful in creating both thick and thin lines depending on the angle, as well as great for blocking in solid shapes. 


A Bright Brush is similar to a Flat Brush with its flat square shape however the bristles are shorter overall. Like the Flat Brush, a Bright Brush also creates a sharp edge. However a Bright Brush is best used for short controlled strokes. 


A Filbert Brush is a flat brush with a rounded tip like an oval shape. This rounded edge is perfect for creating strokes with no hard edges. 


A Fan or Blender Brush is a wide flat brush that fans out in the shape of a V. This brush can be used to smooth out already painted strokes as well as can be used to create texture. 


A Liner, Script, or Rigger Brush is a long, very thin tipped brush. This brush is best used for fine details or lettering. The extra long bristles are able to hold more paint which allows for long painted linework.


Along with all these different shaped brushes comes a wide variety of materials that these brushes can be made up of. We will be discussing six different materials and what they come from.


Kolinsky is one of the finest materials available. Coming from the remote regions of Russia and China, this soft hair comes from the pelt of a mink or weasel. 


Red Sable comes from the red haired weasel and is capable of holding a large amount of pigment. As well, this material is able to hold shape well which assists in creating smooth flat strokes. 


Sabeline comes from high quality Oxen hair yet is less expensive than the Red Sable. Overall this material maintains many of the same qualities as the Red Sable (such as brush stroke quality) other than affordability. 


Ox Hair comes from the hair of a cattle or boar. This material is quite soft and is able to hold plenty of liquid however, it lacks in creating a fine tipped stroke

. 

Camel Hair comes from that of a goat, pony, or squirrel’s hair which makes this material extremely affordable. As well, this material is able to absorb a great amount of liquid however this can create a difficulty in controlling the brush strokes. 


Lastly, there is Synthetic Brushes which are made of nylon or polyester. These less expensive brushes are easier to clean and less prone to breakage due to their man made nature.


It is important to note that many animals used for paint brushes are cruelly killed for their fur much like those used for fur coats. These animals have been hunted, trapped, and gassed for their fur/hair and it is important to research exactly where your materials are coming from. In some instances, certain animals like horses or goats may have been groomed and had their clippings donated, but more times than not animals are cruelly killed. On the flip side, synthetic brushes may be cruelty free but they are not eco friendly. With synthetics taking over 450 years to decompose. Overall, it is important to do your own research on where to purchase your brushes from and consider alternatives. 


Even though brushes can come in many different shapes and be made up of many different materials, they all need the proper care and maintenance in order to last. It's important to never let any brush rest hair side down as this can ruin the bristles. Instead rest the brush horizontally or vertically but with the bristles pointed up towards the sky. It is also good to clean the brushes immediately after using them or in between colours, and not just when you’re done using them. This is because paint can easily dry on the brush if not in use as well as the bristles can be miss-shapen if left sitting in water for too long. The type of washing method can depend on the type of paint used on the brush. After using water based paints, cleaning with soap and tap water will work just fine on brushes. Whereas after using oil or alkyd based paints, you should wash with turpentine and mineral spirits. Make sure to gently massage the bristles when cleaning and always work in the direction of the bristles and not against. A good way to test if a brush is clean is to wipe it against your wrist a few times and if no colour shows up then it is clean. Lastly, always reshape the bristles after washing so that they dry in the proper form.


Now you should have a basic understanding of brushes broken down into the three categories; brush shapes, brush materials, and how to care for your brush. With there being six main brush shapes; Round, Flat, Bright, Filbert, Fan/Blender, and Liner/Script/Rigger Brushes. If you’re new to painting, a Round and Flat brush are the perfect starter pair as these staples are easy to use for many techniques. As well as six different brush materials; Kolinsky, Red Sable, Sabeline, Ox Hair, Camel Hair, and Synthetic. Furthermore the proper wash and care can depend on the type of paint being used. Most importantly, the better you take care of something, the longer it will last! We hope you found this article helpful for your research on brushes. For further information, we encourage you to read MacPherson’s guide on Art Fundamentals-Brushes | MacPherson's.  


Check out our website www.canadaoncanvas.com!


Friday, January 14, 2022

Canvas Kits!

    Canvas Kits, by Fredrix, are an innovative idea for the at home artist! These DIY kits are perfect for easy transportation as well as more cost efficient. Here at KeenArt Media, we offer the kits in multiple sizes. The kits come in long, narrow compact boxes to avoid high shipping costs as well as the risk of damage. Large stretched canvases can be riskier to receive due to the volume of fragile space that could be damaged but canvas kits completely avoid that issue by shipping the contents unassembled. With easy to follow instructions, the canvas kits can be assembled as quickly as in under 20 minutes! These kits are perfect for artists who love to paint on a large scale as well as look for an affordable option!

These Canvas Kits include many items in order to create your very own stretched canvas! Within these kits are four gallery wrap 1 ⅜ profile stretcher bars, an archival canvas, corner and cross braces, a clever lever, assembly screws, and a step by step instruction. All the materials are made by Fredrix Red Label which provides a double primed, acid-free acrylic titanium gesso duck canvas as well as kiln dried stretcher bars for high quality professional results. The Clever Lever, created by Fredrix, eliminates the need for pliers and stretches the canvas extra taut. We offer multiple large sizes for Canvas Kits that way you will be sure to find the perfect fit for yourself.


Sizes:

  • 36 x 48

  • 36 x 60

  • 36 x 72

  • 40 x 40

  • 40 x 60

  • 48 x 48

  • 48 x 60

  • 48 x 72

  • 60 x 60

  • 60 x 72

  • 60 x 84


Canvas Kits are best for large scale artworks as they come compact thus creating a more affordable shipping fee as well as being less likely to experience any damage when transported. The canvas is a versatile material that can be used for multiple mediums such as acrylics, oils, water soluble oils, paint markers, permanent markers, spray paints, and alkyds. 


How To Assemble:

  1. Begin by rolling out the canvas.

  2. Then lay the canvas face down with the pre-attached stretcher bar placed closest to you.

  3. Assemble the stretcher bars using the tongue and groove corners to slide them together. 

  4. Install the corner braces as these assure a tight 90 degree angle for perfect corners.

  5. Then attach the cross braces for added support.

  6. Begin stretching the canvas on the opposite side of the pre-attached stretcher bar.

  7. Stretch by placing the lever in the top groove of the stretcher bar and folding the canvas over the lever and tilt the lever at a 90 degree position.

  8. Place the wood clip over the center of the folded canvas, then place the other two clips on the outer sides of the folded canvas.

  9. Gently push down on the lever creating tension on the canvas. 

  1.  Then staple canvas.

  2. Repeat on each side of the canvas.


To purchase visit: Canvas Kits - USA Art Supplies, Fine Art Materials & Picture Frames For The Visual Arts (usaoncanvas.com)

For more information: RED LABEL GALLERY KIT, 12oz Acrylic Primed Cotton Canvas – Fredrix Artist Canvas

Step by Step Assembly: How to Instruction for Fredrix Stretch It Yourself Kit


Wednesday, December 8, 2021

Scroll Canvas - NEW

    Interested in creating a unique piece of art but still can’t find the right materials? Look no further, our new Scroll Canvas is the perfect surface to create your art on! Our regular stretched canvas is perfect for a classic, traditional approach with its simple stretched borders. However now our new Scroll Canvas is unique but not too out there, it comes on a thin flat canvas with wood panels on the top and bottom to create a scroll-like effect. This super simple upgrade can take your art to the next level! This canvas will be a perfect addition to any room in your home.


Sizes

  • 12 x 12

  • 12 x 16

  • 16 x 20


Fredrix Scroll Canvas is made from a 100% cotton canvas that is already acrylic primed. The lightweight wood panels attached to the top and bottom are dual purpose, as they create the perfect scroll visual as well as connect to a hardboard backing for stability and structure. This backing also cancels out wrinkles or curling that the canvas might usually endure. This thin flat scroll canvas also features jute string at the top for easy, durable hanging. 


The Scroll Canvas is perfect for all types of artworks! Its pre primed surface makes it ready for use as soon as it arrives. This canvas is perfect for acrylic and oil painting as well as a variety of other mediums such as paint markers, spray paint, vinyl letters, and permanent markers! Featured in three different sizes, the scroll canvas is available in 12” x 12”, 12” x 16”, and 16” x 20”.


For more information on where to get your Scroll Canvas: Scroll Canvas - Vancouver Art Supplies, Fine Art Materials & Picture Frames For The Visual Arts

For more products like this: Canvas & more - Vancouver Art Supplies, Fine Art Materials & Picture Frames For The Visual Arts


Friday, November 26, 2021

Digital Art for Youths!

     In today’s modern society, new forms of art are being developed through the advances in technology. With that in mind, traditional art is certainly not a dying field but is instead modifying and mixing with the new age and creating altogether a new form of art, known as digital art. 


Digital art can be recognized as having a futuristic, almost life-like appeal to it with its vibrant colours and realistic technique. However that doesn’t mean all digital art looks the same, some artists create works that appear to be made traditionally, as it all depends on style. Digital art is formed using computer or multimedia arts and can create a large variety of artworks. Media arts have been around since the 1960s and are continuing to advance to this day. 


    There are many different ways to create digital arts as this term reflects a variety of art forms. One method of digital art that can be helpful for beginners, is to create a hand drawn image that is then scanned into the computer and edited from there, using software's such as Photoshop. This is a simple way to begin practicing sketching online and understanding the different tools offered as it requires a reference. A more advanced and commonly used digital media tool is the Wacom tablet, used by many artists. This tablet is designed for creating and editing digital art as well as comes along with its own pen. This is a very useful option for photographers, graphic designers, and artists alike. There are many different programs designed for digital art although they each are geared towards different specialties; some for sketching, some for editing, etc., as well as varying pricing. Adobe offers many programs that are narrowed down to specialties. Nowadays, there are plenty of free tutorials available online through services such as YouTube to help anyone at any stage. 


Digital art does not require much more than traditional art would in terms of materials. As it requires a computer or tablet, a digital art software, a stylus, and a basic understanding of drawing. Some consider digital art to be easier than traditional arts however it does have its own obstacles, understanding the program being used can be tricky getting started. Overall though, like any skill, practice makes perfect! With the right amount of drive and passion, anyone can be a digital artist! 


An example of a step by step portrait created digitally. 


Modern technology has advanced the art world in unimaginable ways and is quite accessible to all! Although creating digital art can be on the pricier side, most art forms do require a bit of investment. However with digital art, materials do not need to be restocked! With all the online programs and tutorials, anyone is able to learn this medium. Using a tablet is very similar to traditional hand drawn art except with many more benefits such as the ability to change the colour or brush stroke with the touch of a button!


To find out more about local artists who create with many mediums: Vancouver On Canvas- Local Artist Guide


Monday, November 22, 2021

Painting for Youths!

    When it comes to painting, it can seem overwhelming with all of its diversity. From different mediums, to different styles, as well as endless materials to even paint on! With the help of this article, painting will be broken down for you to understand. Including the different types of paints and what they do as well as helpful tips and tricks for beginners! Doing a small art project a week is the perfect way to spark the creative side as well as gain practice and build confidence. 


One of the most important steps when it comes to painting is knowing how to break down and understand a painting, even before you begin creating one. The easiest way to break down any art medium is by understanding its Form, Content, and Context. The Form of an artwork is strictly what you see, including its lighting and shadows, contrast, colours, linework, medium, and size to name a few. The Content of an artwork is the story you see within the art, whether it be a scene of a garden at sunset or a child playing by the river. The Context is the back story; when it was made, how it affected its audience, and how its meaning has grown over time. In simpler terms, Form is for the artist, Content is for the story tellers, and Context is for the history buffs. For example, looking at The Invasion (1892) by William-Adolphe Bouguereau, it is an oil painting composed mainly of cool colours such as greens and blues with stark contrasts and lighting focused upon the central figures. The image seen appears to be a half nude woman in a blue cloth surrounded by cherubs or cupids in the forest. It was made in 1892 as a private aesthetic painting, strictly to visually appeal with no deeper meaning in its point in history. Also, it holds themes of classic Greek mythology as well as the idealization of the female form.


The two main mediums of painting are oil and acrylic, with one being traditional and the other being more modernized. With acrylic paints being invented roughly in the 1950s and oil paints being used as early as the 7th century. Acrylic paint comes with many perks such as fast drying, even coating, base coat deemed unnecessary, adheres to any surface, and water soluble. Oil paints on the other hand have a flexible depth of colour as well as can be applied in thin and thick glazes. The biggest difference between the two is the drying times, with acrylic drying in roughly half an hour and oil drying in roughly 24 hours. This is neither good nor bad, just dependent on the painter themselves and their preferences. 


Another popular painting medium is watercolour which is an easily blend-able transparent pigment that can be reactivated with water. A similar medium to this is gouache, with the primary difference being that gouache is more opaque than watercolour. These paints are perfect for creating dreamy pastel artworks and are easy to use as they can be reactivated with water, making the paint itself last a long time. However, these water paints can only be applied to certain papers and the paint can crack if too many layers are applied. 


Tips and Tricks for beginner painters:

  • Use water based paints to start (i.e. acrylic, watercolour, gouache) as they do not require any toxic solvents

  • Use masking tape to create a boarder or block out any areas you don't want painted

  • Always create a light sketch as to not smudge the pencil

  • Starting off with a base wash ( a light watery base of paint that goes under the painting ) on the canvas can make painting less intimidating

  • Less is more! Always use less paint to start to avoid waste, as you can always get more

  • If possible, prop the canvas up so its facing you, that way you will get a   proper perspective 

  • Mixing white into the different colours creates more opaque paints

  • Use dark shades of blue or purple for shadows as black can be too harsh


There are many benefits towards youth educational development through the arts. Through practicing art, young people will develop their learning in ways of thought, knowledge, expression, and feeling through the basis of creativity. As well, art can help build confidence within a young person. The skills learned through making art can result in an out of box thinking style and help with taking criticism and guidance from others. Art has many ties within other subjects such as math's, science, and history and can lead to a better understanding of all subjects when taught to think creatively. More benefits of art education can include a deepened understanding of culture as well as self, and improved cognition in the forms of verbal and visual memory, motor skills, and language communication. Overall, learning varying forms of art can lead to many personal growth benefits in young people as art has more power than just creativity.


Painting can seem intimidating and tricky when you're a beginner however with practice and time you will see results! Understanding the difference between types of paint such as oil, acrylic, watercolour, and gouache is the first step in painting. With the help of the tips and tricks listed above, as well as the breakdown of Form, Content, and Context, you will have everything you need to know to get started. And with all the education benefits that come along with the practice of art, there is no reason to not want to become a painter! Like any art form, practice makes perfect!


        Next week we will discuss a more modern take on art for young people, specifically artwork created using digital media! Stay tuned to find out more and see how traditional arts go hand in hand with modern arts, as well as tips and tricks on how to get started for beginners!

For more information on local artists supported by KeenArt Media: VancouverOnCanvas: Local Artist Guide