Showing posts with label canvas. Show all posts

Wednesday, July 27, 2022

How to Finish Your Frames!

There are many styles of finishes when it comes to frames. And that's not including types of products to finish frames with! When looking for the perfect picture frame to fit your style, it's important to understand all the possible finishes that could add to your home. Whether that be a metallic finish, a wax finish, a crackle finish, a painted finish, or an antique finish. This article will help break down what each finish is and how to accomplish it. 
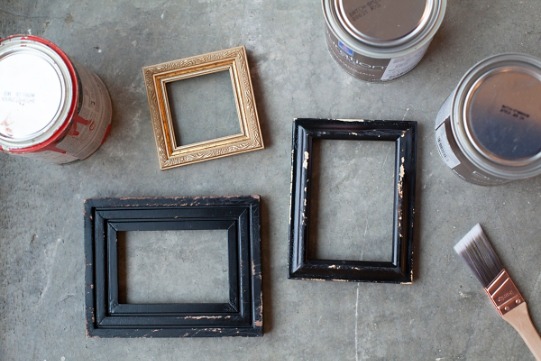


A Metallic Finish has a slightly glossy, pearl-like appearance. It is best to use this finish on smaller frames as the effect can be overwhelming on a large frame, thus taking away from the image it holds. To achieve this look, first prep the surface of the frame rather by sanding or wiping down any dust with a rag, depending on the material of the frame. Then apply two coats of any special metallic paint. Let dry and viola a metallic frame!
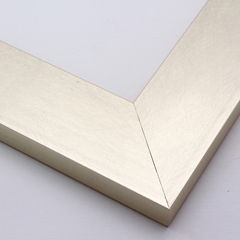

Metallic Finish


A Wax Finish is the most subtle of finishes as well as the most luxurious. This polished appearch is easy to achieve. Begin with staining your frame to the desired colour, or leaving it as is if the colour is one you like but want to elevate. Once the frame is dry, apply a clear coat of wax using a rag or brush, and let dry. Then sand with a steel wool pad and apply the wax again. Repeat with sanding and one more final coat of wax, and finally buff out with a cloth.
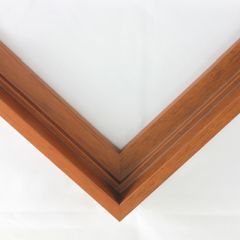

Wax Finish


A Crackle Finish showcases a multidimensional use of paints in a crackling effect as its layers create depth. This finish is more difficult to achieve due to its unpredictable nature. This is also determined by the thickness of your layers. To achieve a crackle finish; you must add a layer of crackling paint, then a crackling gel, and then a final layer of crackling paint. Another option to get a crackling effect is to apply a coat of glycerophtalic paint and before it completely dries, add a layer of acrylic paint. Then after it's dried, apply a thin layer of furniture polish and it should naturally crackle.


Crackle Finish


A Painted Finish is the most common of finishes due to its easy application and endless colour options. It is also the best option for durability and longevity, however a painted finish adds a completely solid colour thus hiding the wood grain which can be undesirable for some people. Before painting, it is important to prep the surface of your frame by sanding and filling in any unwanted holes or defects with wood filler paste. Sand again after allowing the paste to dry and wipe any dust away with a cloth or a sponge. Then add 1-2 coats of paint, sanding in between layers and allowing 24 hours to dry for each. You can also apply a varnish or lacquer on top for a glossy finish!


Painted Finish


An Antique Finish creates a beautifully distressed-vintage appearance. There are multiple methods that can be used to achieve this look. The simplest way to attempt this look is to paint your frame with a lighter colour and allow it to dry. Then using a cloth, soak it in a darker paint and sporadically dust your frame with it to create an aged-bespeckled appearance. The next method is to apply a dark coloured paint to your frame and allow it to dry. Then apply two coats of a lighter coloured paint on top and allow to dry. Then use sandpaper to remove any areas of the lighter paint that you want the darker paint to peek through for a worn effect. Using sandpaper is effective in removing the paint however, attempt lightly as it can also remove any intricate details of the frame itself. The last method is to paint your frame with a dark chalk paint and allow it to dry. Once dry, rub the frame all over with a beeswax candlestick. Then paint over with a lighter chalk paint and allow it to dry. The wax creates a barrier so the paint will not be able to stick in certain areas. Finally use strips of clear packing tape and stick to sections of the frame that you want paint to be removed from for a distressed look. 


Antique Finish


After reviewing all of these finishes; Metallic, Wax, Crackle, Painted, and Antique, we hope at least one of these helped determine how you would like to finish your frames. All of these methods can be achieved with a few simple steps as long as you have the right materials. Don’t forget to always prep your surfaces, whether it be sanding or wiping away any dust as it'll make it harder for the finishes to stick. Overall, these finishes are perfect for those of you who enjoy DIY-ing your projects and creating unique, low cost home decor!

Tuesday, July 26, 2022

A Quick Guide to Mediums and Gesso!

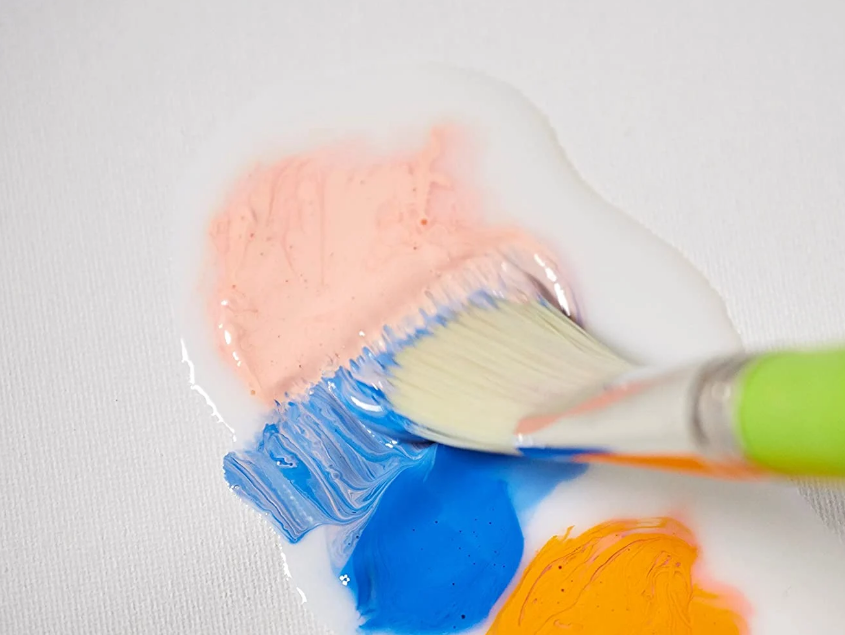
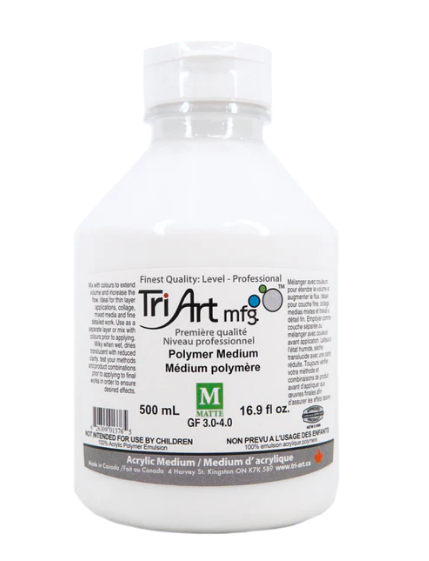
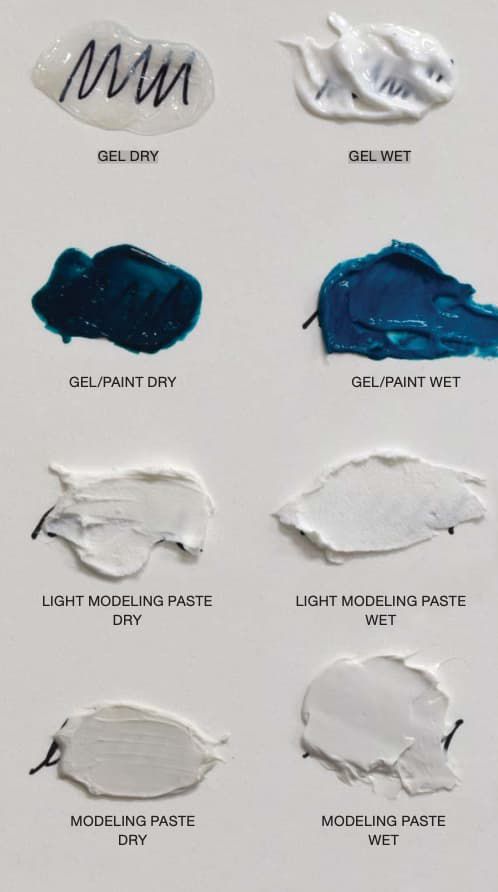
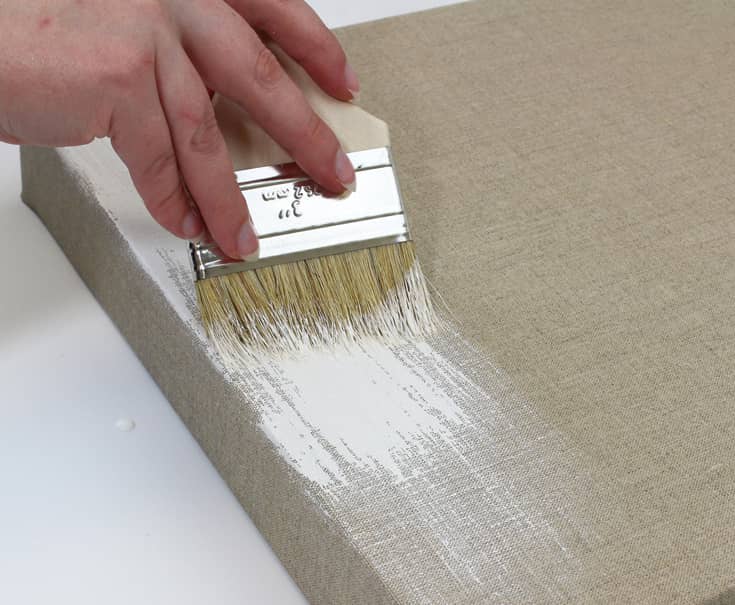
 When it comes to painting, there are many terms and techniques used that may be unfamiliar. In this paragraph, we will be going to break down each term and how it's used. Before beginning your painting, you will want to apply a pre layer called Grounds, short for “background”. The Ground (base) layer is used to support your painting’s colour and tone. It consists of rather gesso, paint, or other wet mediums, depending on the surface it is being painted on such as panels or canvas. Gesso is a primer made from a combination of paint pigment, chalk, and binder. It is used to prepare or prime a surface for oil painting. When painting, there are materials that can change the consistency of your paint to add texture. These materials are called Texture Gels and they are used by mixing with the paint. Texture Gels have a stiff texture that makes it easy to shape and hold form. In the opposite effect, we have Mediums, which are meant to thin out paints. Mediums are best used for acrylic paints to lengthen working time. Another material you can add to your paint is Additives. Instead of just adding texture, additives reduce the drag on a brush or provide anti-slip. They also make the paint flow better on a surface as well as stick better to difficult surfaces. A Liquid Polymer is mixed with the paints as it extends the paint, creates glazes, enhances gloss, and increases film integrity.. After you’re done with your painting, you still have to apply a Finish. There are multiple finishes to choose from with different levels of sheen; matte, satin, or gloss. This is the final layer of the painting, it should be thin, transparent, and colourless. This layer is also meant to protect the painting from the atmosphere, a Varnish is the perfect option for protection and differing sheen levels.

Grounds                                                  Gesso

Mediums                                           Liquid Polymer


Texture Gels                                    Finishes


Friday, January 14, 2022

Canvas Kits!

    Canvas Kits, by Fredrix, are an innovative idea for the at home artist! These DIY kits are perfect for easy transportation as well as more cost efficient. Here at KeenArt Media, we offer the kits in multiple sizes. The kits come in long, narrow compact boxes to avoid high shipping costs as well as the risk of damage. Large stretched canvases can be riskier to receive due to the volume of fragile space that could be damaged but canvas kits completely avoid that issue by shipping the contents unassembled. With easy to follow instructions, the canvas kits can be assembled as quickly as in under 20 minutes! These kits are perfect for artists who love to paint on a large scale as well as look for an affordable option!

These Canvas Kits include many items in order to create your very own stretched canvas! Within these kits are four gallery wrap 1 ⅜ profile stretcher bars, an archival canvas, corner and cross braces, a clever lever, assembly screws, and a step by step instruction. All the materials are made by Fredrix Red Label which provides a double primed, acid-free acrylic titanium gesso duck canvas as well as kiln dried stretcher bars for high quality professional results. The Clever Lever, created by Fredrix, eliminates the need for pliers and stretches the canvas extra taut. We offer multiple large sizes for Canvas Kits that way you will be sure to find the perfect fit for yourself.


Sizes:

  • 36 x 48

  • 36 x 60

  • 36 x 72

  • 40 x 40

  • 40 x 60

  • 48 x 48

  • 48 x 60

  • 48 x 72

  • 60 x 60

  • 60 x 72

  • 60 x 84


Canvas Kits are best for large scale artworks as they come compact thus creating a more affordable shipping fee as well as being less likely to experience any damage when transported. The canvas is a versatile material that can be used for multiple mediums such as acrylics, oils, water soluble oils, paint markers, permanent markers, spray paints, and alkyds. 


How To Assemble:

  1. Begin by rolling out the canvas.

  2. Then lay the canvas face down with the pre-attached stretcher bar placed closest to you.

  3. Assemble the stretcher bars using the tongue and groove corners to slide them together. 

  4. Install the corner braces as these assure a tight 90 degree angle for perfect corners.

  5. Then attach the cross braces for added support.

  6. Begin stretching the canvas on the opposite side of the pre-attached stretcher bar.

  7. Stretch by placing the lever in the top groove of the stretcher bar and folding the canvas over the lever and tilt the lever at a 90 degree position.

  8. Place the wood clip over the center of the folded canvas, then place the other two clips on the outer sides of the folded canvas.

  9. Gently push down on the lever creating tension on the canvas. 

  1.  Then staple canvas.

  2. Repeat on each side of the canvas.


To purchase visit: Canvas Kits - USA Art Supplies, Fine Art Materials & Picture Frames For The Visual Arts (usaoncanvas.com)

For more information: RED LABEL GALLERY KIT, 12oz Acrylic Primed Cotton Canvas – Fredrix Artist Canvas

Step by Step Assembly: How to Instruction for Fredrix Stretch It Yourself Kit


Wednesday, January 5, 2022

Aluminum Stretcher Bars

A new product is on the rise here at KeenArt Media and this article will help break down how it works as well as all its pros and cons. An Aluminum Stretcher Bar made by the Jack Richeson Group is the next best thing to come to stretcher bars. While it may look very similar to a regular stretcher bar, it does have its differences and perks. 


The new Aluminum Stretcher Bars are created out of kiln dried Pine and recycled Aluminum. The pine wood frame sits on the outside of the aluminum frame, and creates a classic smooth rounded edge as well as provides a solid surface for stapling a canvas onto. The added metal frame on the inside guarantees a heavy-duty, strong, stable structure which is perfect for large canvases. When the canvas is attached, it will sit ½” away from the bars, preventing the appearance of ghost lines. Together these two frames create both a perfect 90 degree angle and a straight edge. The Aluminum Stretcher Bars come in three main styles; Gallery Wrap Bars, Heavy Duty Bars, and Pro Bars. Both the Pro bars and Heavy Duty bars can come as short as 11” and up to as large as 144” whereas the Gallery Wrap bars only come as large as 120”.

The benefit of using aluminum stretcher bars over regular wood stretcher bars is that the metal will hold the wood in place for centuries. As time goes on, the metal will never warp, twist, or bend guaranteeing a long lasting pristine conditioned frame unlike a regular wood stretcher bar. Combining both the metal and wood frames only elevates the stretcher bar as it doesn't lose the traditional manner of assembly and production, but instead adds more stability and extends the artwork's lifetime. As well, these frames are keyable meaning additional support can be added using Key Corner Supports. These keys attach to the inner corners of a canvas and are able to re-stretch a canvas if required. This is done by expanding the corners of the canvas, ultimately tightening a possibly loose canvas. As well, this can be reversed to relax the canvas back to its original tensions if need be.


Pros

Cons

  • Longer lifespan

  • Stronger/Sturdier

  • Keyable

  • Many length options

  • Straight edge

  • No ghost lines

  • Greater shipping expense

  • Less profile options


  Although the aluminum stretcher bars have a long list of benefits, there are some other things to consider. Since the materials used are greater, this can lead to a greater sum in price. While the bars are more likely to last and benefit you in the long run, it is worth noting that it may be a bit of an investment compared to regular wood frames. Aside from pricing, the bars may have a wide variety of lengths however there is not a wide variety of profiles to choose from. The aluminum bar has a set profile of a 1 inch depth whereas the wood frames do vary depending on style. The Pro Bars have a wood frame depth of 1 ⅜, the Heavy Duty bars have a wood frame depth of 1 ⅜, and the Gallery Wrap bars have a wood frame depth of 2 ¼. There are no other options for the different styles. In contrast, the wood stretcher bars already offered at KeenArt Media come in a variety of profile depths such as 7/16, ⅝, ¾, ½, 1, 1 ⅛, 1 ¼, 1 ½, 1 15/16, 2, 2 ½, and 3 inches. These sizes are available for pre assembled stretcher bar frames as well as unassembled stretcher bars.  


How to Assemble:


1. Insert the corners into the channels in an aluminum bar (2 per corner). At this point assemble 3 of the bars.

2. Once the 3 are assembled, put the remaining corners in the remaining bar. Align the corners with slots and insert.

3. Attach the Best Keys with screws using the pre drilled holes.

4. Cross braces are recommended for any bar 36” or longer. If the vertical and horizontal cross braces were ordered, they will come notched at the intersection for a flush fit. 

5. Attach the notched braces in the center using a flat head screw (not included). Single cross braces will simply attach to the bar frame using screws.

6. The cross braces are attached to the stretcher bar using the Best Cross Brace Bracket. Drill a pilot hole in the stretcher bar with a 3/32” drill bit, then attach the cross brace bracket and cross brace as shown.


For more information: Aluminum Stretcher Bars 

Wednesday, December 15, 2021

Stretched Artist Canvas - ALL

    Our art supplies selection offers a wide variety of materials, especially when it comes to canvas. In this article, we will be discussing all the stretched canvases offered at Vancouver On Canvas! We will discuss the different sizes, shapes, materials that can be used with these canvases, as well as what they’re made from! Keep reading to learn more about Metallic Canvases, Stretched Round/Oval Canvases, Convexo Canvases, and Standard/Profile Canvases.


The Metallic Stretched Canvas comes in two shades, Gold and Pearl. These triple primed cotton canvases are available in 8 sizes each. The metallic canvases work well with acrylics and oils as they are primed with a universal acrylic gesso. The canvases also accept paint markers, spray paints, alkyds, permanent markers, and water soluble oils. The canvases are stretched on kiln dried stretcher bars and ready to hang. These are the perfect canvas for creating a unique artwork, leave certain areas bare to show off the natural metallic sheen that is the canvas for a luxurious appearance!

Sizes:

  • 6 x 6

  • 6 x 12

  • 9 x 12

  • 12 x 12 

  • 16 x 20

  • 18 x 24

  • 24 x 24

  • 24 x 36


Pearl - Metallic Pearl Stretched Canvas 

Gold - Metallic Gold Stretched Canvas 


Our medium texture duck canvas is available in both round and oval stretched frames. These canvases come in a wide variety of sizes, as well as come in a double primed acid free acrylic titanium gesso. Both the round and oval canvases come in a ¾ profile. These receptive surfaces pair well with acrylics, oils, water soluble oils, paint markers, alkyds, spray paints, and permanent markers. These unique shaped canvases are perfect for fine art and craft making and suit any style!


Round Sizes:

  • 5”

  • 8”

  • 10”

  • 12”

  • 16”

  • 20”


Oval Sizes:

  • 5” x 7”

  • 6” x 8”

  • 8” x 10”

  • 9” x 12”

  • 11” x 14”

  • 16” x 20”

  • 12” x 16”


Round - Round Stretched Canvas

Oval - Oval Stretched Canvas  


The Convexo Canvas is very similar to our regular stretched canvas but has a unique beveled edge. It consists of a 100% cotton uniform texture that is primed with an acrylic titanium gesso. These no frame-ready to hang stretched canvases come in both a round and rectangular shape in a variety of sizes. These convexo canvases work well with acrylics, oils, water soluble oils, alkyds, paint markers, spray paint, and permanent markers. 


Rectangular Sizes:

  • 18” x 24”

  • 24” x 36”

  • 30” x 40”

Round Sizes:

  • 8”

  • 12”

  • 16”

  • 20”

  • 24”

  • 30”

  • 36”

  • 40”

Round - Convexo Round Canvas

Rectangle - Convexo Rectangular Canvas   


Our Standard Canvas comes in many sizes however it is only available in two different profile sizes, ¾ inch and 1 ½ inch. These canvases come double primed in an acrylic gesso and stretched over a wooden frame, for easy hanging. Larger sized canvases will come braced for extra support. These standard canvases are the perfect choice for a traditional canvas and they are ready to use upon arrival making less work for the artist! With all the selection of sizes, you will be sure to find exactly what you need. The standard canvas works well with a variety of mediums such as oils, acrylics, paint markers, permanent markers, spray paint, alkyds, and water soluble oils.  

Standard ¾ Sizes:

  • 4 x 6

  • 5 x 5

  • 5 x 7  

  • 5 x 10

  • 6 x 6

  • 6 x 8 

  • 6 x 12

  • 6 x 20 

  • 6 x 24 

  • 6 x 36

  • 7 x 7

  • 7 x 9

  • 8 x 8

  • 8 x 10

  • 8 x 16

  • 8 x 24 

  • 8 x 36

  • 8 x 48

  • 8 x 60

  • 9 x 12

  • 10 x 10

  • 10 x 12 

  • 10 x 14

  • 10 x 20

  • 10 x 30

  • 11 x 14

  • 12 x 12

  • 12 x 14

  • 12 x 16

  • 12 x 18

  • 12 x 24

  • 12 x 36

  • 12 x 48

  • 14 x 14

  • 14 x 18

  • 15 x 30

  • 16 x 16

  • 16 x 20

  • 16 x 24

  • 16 x 48

  • 18 x 18

  • 18 x 24

  • 18 x 36 

  • 20 x 20

  • 20 x 24

  • 20 x 26 

  • 20 x 28 

  • 20 x 30

  • 20 x 40

  • 22 x 28

  • 24 x 24 

  • 24 x 30

  • 24 x 36

  • 24 x 48

  • 24 x 60

  • 30 x 30

  • 30 x 36

  • 30 x 40

  • 30 x 48

  • 30 x 60

  • 36 x 36

  • 36 x 40 

  • 40 x 40

Profile 1 ½ Sizes:

  • 4 x 4

  • 4 x 5

  • 4 x 6

  • 5 x 5

  • 5 x 7

  • 5 x 10

  • 6 x 6

  • 6 x 8

  • 6 x 12

  • 6 x 16

  • 6 x 18

  • 6 x 20

  • 6 x 24

  • 6 x 30

  • 6 x 36

  • 7 x 7

  • 7 x 9

  • 8 x 8

  • 8 x 10

  • 8 x 12

  • 8 x 16

  • 8 x 18

  • 8 x 24

  • 8 x 30

  • 8 x 36

  • 8 x 48

  • 9 x 12

  • 10 x 10

  • 10 x 12

  • 10 x 14

  • 10 x 20

  • 10 x 24

  • 10 x 30

  • 10 x 48

  • 11 x 14

  • 12 x 12

  • 12 x 14

  • 12 x 16

  • 12 x 18

  • 12 x 24

  • 12 x 30

  • 12 x 36

  • 12 x 48

  • 12 x 60

  • 12 x 72

  • 14 x 14

  • 14 x 18

  • 15 x 30

  • 15 x 60

  • 16 x 16

  • 16 x 20

  • 16 x 24

  • 16 x 30

  • 16 x 36

  • 16 x 40

  • 16 x 48

  • 18 x 18 

  • 18 x 24

  • 18 x 30

  • 18 x 36

  • 18 x 48

  • 18 x 72

  • 20 x 20

  • 20 x 24

  • 20 x 26

  • 20 x 28

  • 20 x 30

  • 20 x 40

  • 20 x 48

  • 20 x 60

  • 22 x 28

  • 24 x 24

  • 24 x 30

  • 24 x 36

  • 24 x 48

  • 24 x 60

  • 30 x 30 

  • 30 x 36

  • 30 x 40

  • 30 x 48

  • 30 x 60

  • 36 x 36

  • 36 x 40

  • 48 x 72


Standard ¾ - Standard 3/4" Canvas 

Profile 1 ½ - Profile 1 1/2" Canvas  


For more products like this: Vancouver Canvas Photo Prints, Custom Made Picture Frames & Plaque Mounts, Face Mounting Prints On PlexiGlass 

Be sure to check out: https://fredrixartistcanvas.com/